
Whatever your passion, it is the time to start blogging now!
Do you have a passion and knowledge about a certain subject? Do people keep telling you that you should start a blog?
Don’t wait. Today is your day to start!
Running your own Blog can be fun and potentially profitable!
Today I will show you how to easily creating a blog on your own. Blogging allows me to make thousands of dollars a month, by doing something that I love. Plus, you can start a money-making blog for the price of just one Starbucks coffee a month!
Click here to start a blog on WordPress, then use the tutorial below for the easy directions.
I’ll help you share your knowledge of the subject you care about most. Just follow these 4 fast, easy steps and you’ll have your blog online very quickly.
Ready to Start Blogging Now? Let’s jump in.
Disclaimer: Please note that some of the links below are affiliate links and I will earn a commission if you purchase through those links. I have used all of the products listed below and recommend them because they are helpful and are companies that I trust.
The Four Easy Steps to Starting Your Disney Blog:
- Hosting and Domain Name
- Install WordPress
- Design Your Blog
- Start Blogging
1) Hosting and Domain Name
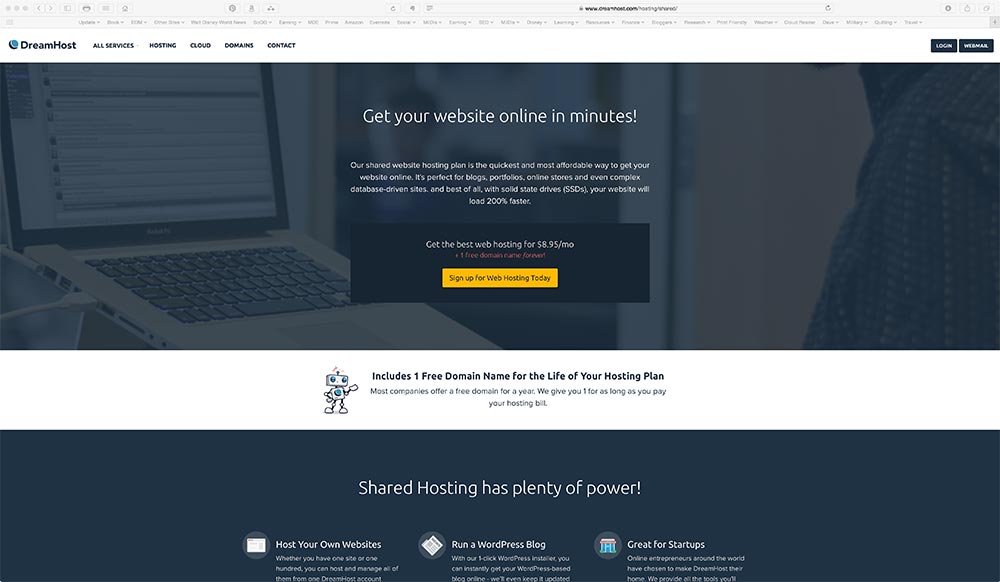
 The first thing you’ll need to do is to sign up with a Web Hosting Company. This will be where the files for your blog will reside, on your hosting company’s servers.
I use Dreamhost, I’ve been with them from the very start. They have different levels of plans based upon the amount of traffic that you’ll need to serve.
Swivel Chair Millionaire has its own private server to handle the volume of traffic that we receive on our various sites, but to start you’ll just need the entry level Shared Hosting Plan. This is what we used for many years!
You can opt for Monthly, One Year, or Three Year Plans.
The Annual Plans will save you some cash! I started with the One Year Plan myself.
Current Prices are:
- $10.95 monthly
- $9.95 a month on the One Year Plan
- And the best savings is $7.95 a month on the Three Year Plan
Plus with your signup you will receive 1 Free Domain Registration for the life of your plan!
You’ll never have to pay for your Domain Registration. This is an $8.49 to $109.99 yearly value depending on the Domain extension that you pick (A .com Domain is $13.95 a year).
What will you call your blog?
Your web address, i.e. www.http://YourNewSite.com is called your domain name. You’ll need to pick and register a unique one for your Blog. You can do this during the Hosting signup process or wait until later.
You should first do some brainstorming to come up with many different ideas. Make yourself a list of some possible names.
Once you have a few good ones start the hosting signup process.
Click here of any of the Dreamhost logos on this page to start the signup process.

Please be sure to use our links so that we can get credit!
The Signup Process
After clicking one of the links on this page you will arrive at the Dreamhost signup page.

Click on the Blue “Learn More About Our Web Hosting” Button.
Next you’ll see this page.
Click on the Orange “Sign Up for Web Hosting Today” Button.
Now you’ll create your account.
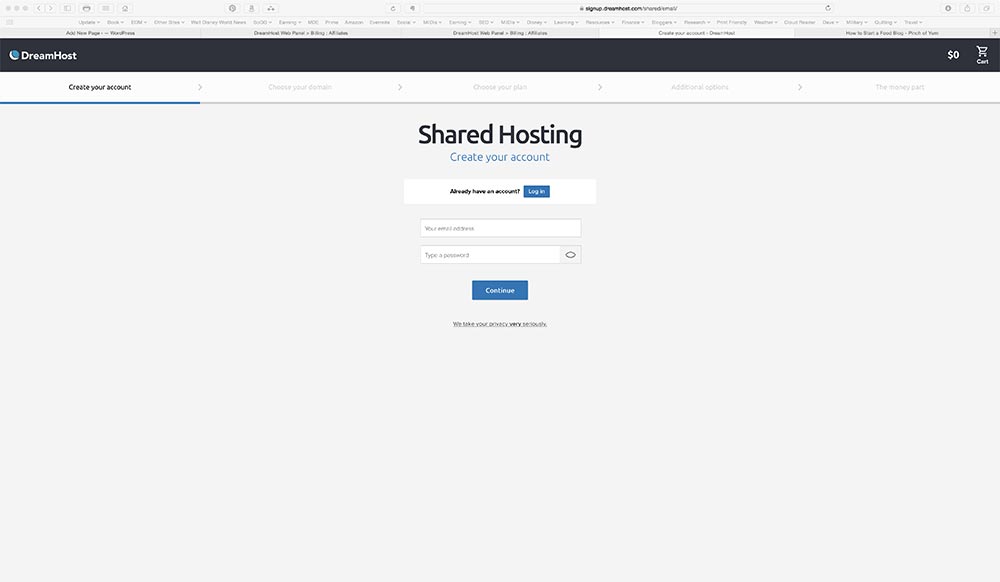
Enter your email and a very strong password. I recommend using the military standard:
- At least 14 Characters
- Contains at least 2 uppercase characters: A, B, C, etc.
- Contains at least 2 lowercase characters: a, b, c, etc.
- Contains at least 2 numbers: 1, 2, 3, 4, 5, 6, 7, 8, 9, 0
- Contains at least 2 special characters, i.e. ! @ # $ % ^ & * ( ) _ + | ~ – = \ ` { } [ ] : ” ; ‘ < > ? , . /
Then click “Continue”
Next you will secure your domain name
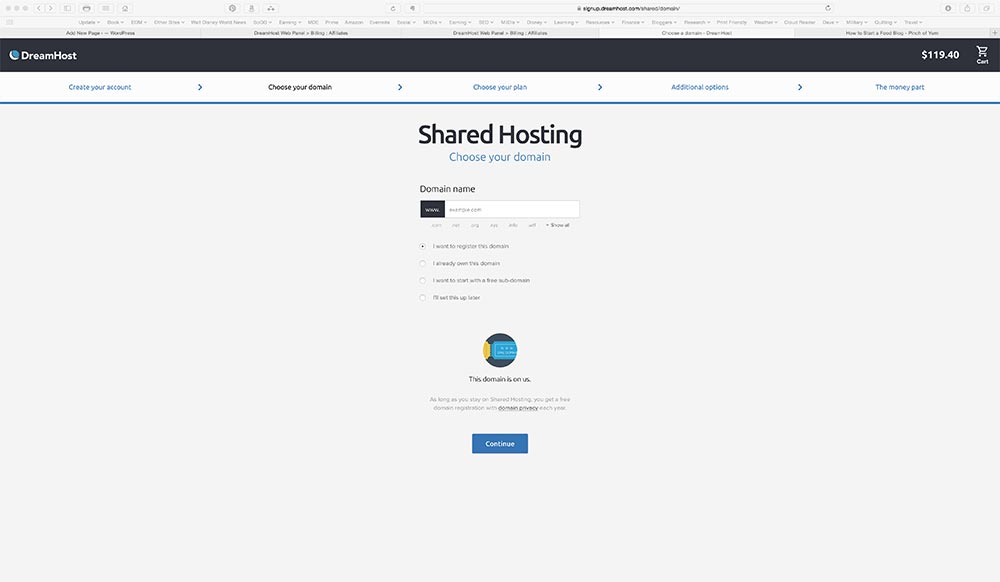
Enter your favorite Domain Name choice including the .com, .net, etc.
Wait a few seconds and you’ll be told whether the Domain is available, if not you will see a few alternate suggestions below.

You can pick one of those or move on to your second favorite Domain Name and so on until you are satisfied.
If your first pick isn’t available keep trying!
Make sure “I want to register this domain” is selected and then click on “Continue”
Next you will choose your plan.
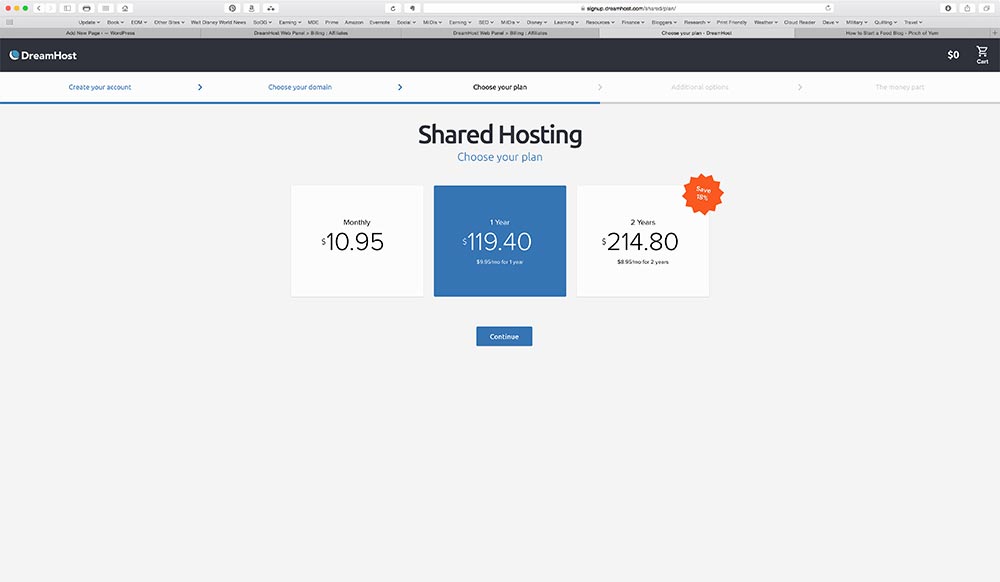
Choose 3 Year or 1 Year for the most savings, or monthly for full price. Click “Continue”
The next page gives you the option to add on a Virtual Private Server for a monthly fee. You Do Not Need This! This is for medium traffic sites, not those just starting out.
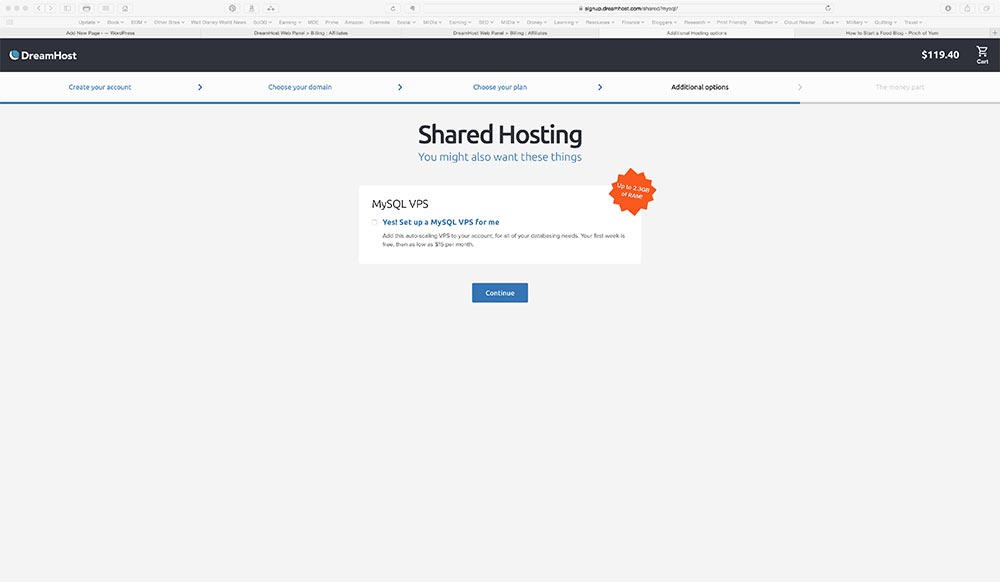
Leave “Yes, set up a MySQL VPS for me” unselected and click “Continue”
Next comes your payment details.
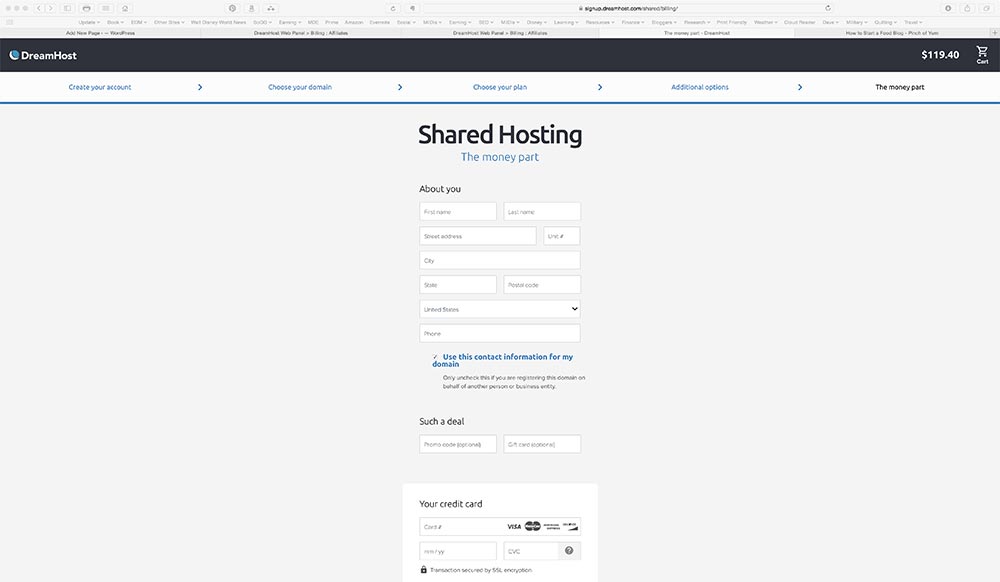
Enter you contact and payment information and click “Place Order Now.”
This contact information is for Dreamhost’s use only! Dreamhost automatically keeps your private information off of your Domain Registration, other hosting companies (with NASCAR sponsorships) charge extra for this.
Your address and phone will not be published where others can see them.
That’s it, you’re done with the first strep on the way to creating your blog!
Registering your domain takes a little while, usually under a half hour. You will get an email from Dreamhost once your Domain Name is purchased and registered for you.
Once you’ve received the email that your great domain name is registered you are ready for the next step.
2) Installing WordPress
While you are waiting you can log into your Dreamiest account and look around. Your menu items will all be on the left of the page.
Once you’ve got your domain registered and hosting activated you’ll need to go through the process of installing WordPress.
WordPress will be your blogging software. It is the same software that I use for the Military Disney Tips Blog. WordPress is very easy to use!
But first you’ll need to tell Dreamhost to “Host” your Domain.
Once you’ve received your conformation email that your Domain is ready, click on “Domains” and then “Manage Domains” in the sidebar.

You will see your Domain listed, how long is left on your registration, “web hosting” status, as well as a couple of other items.
Under Web Hosting you will see “DNS Only” and a link under it which says “Add” click on Add. This turns on the ability to add your site (Host it).
Great, on to the next step.
Here’s how to install WordPress
In the sidebar, click on “Goodies” then One Click Installs”
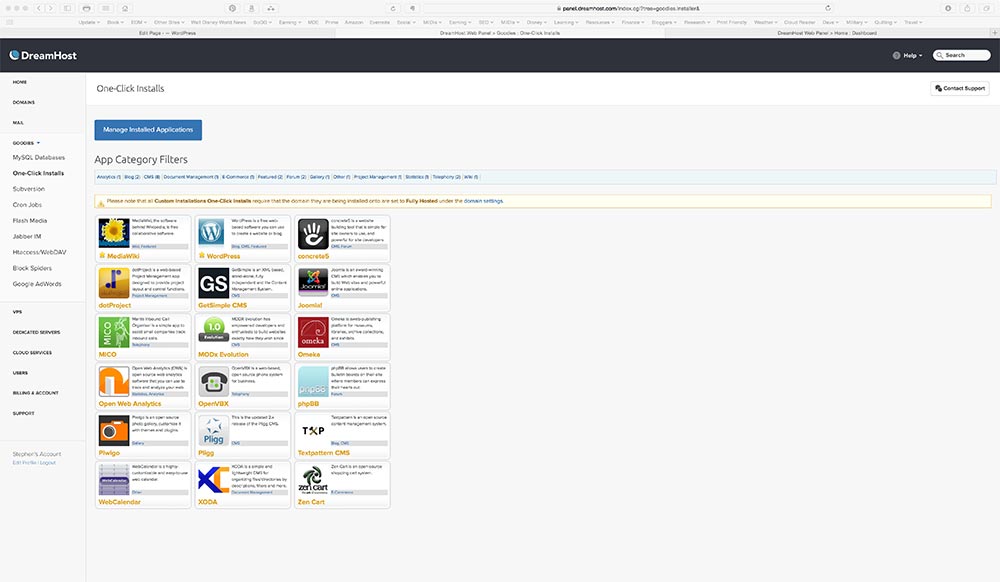
Click on WordPress in the main portion of the page.
A pop up will appear.
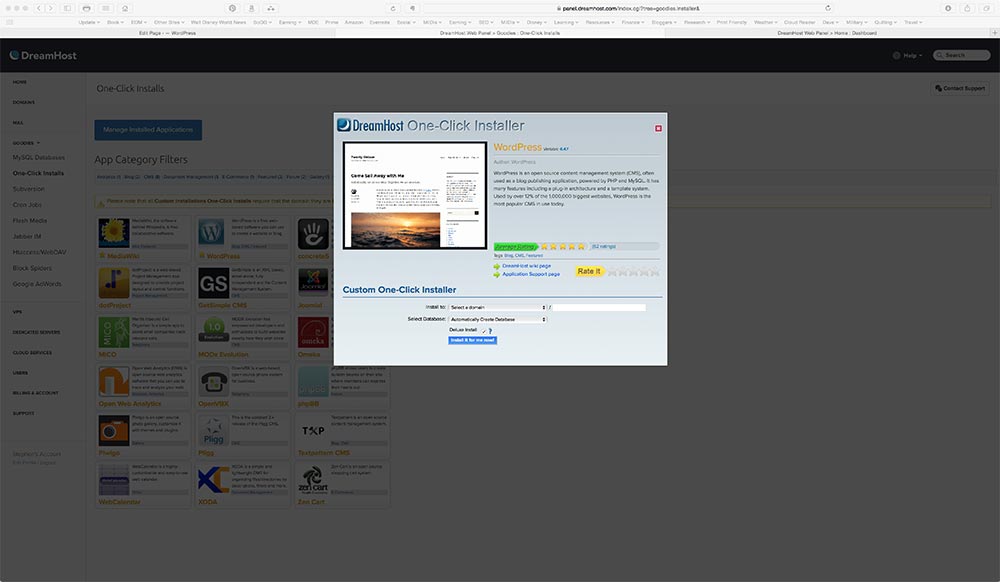
In the drop down select your Domain and leave automatically create database and Deluxe Install selected and click “Install it for me Now.
That’s it!
You will get an email from Dreamhost once the installation is complete. This usually only takes a few minutes.
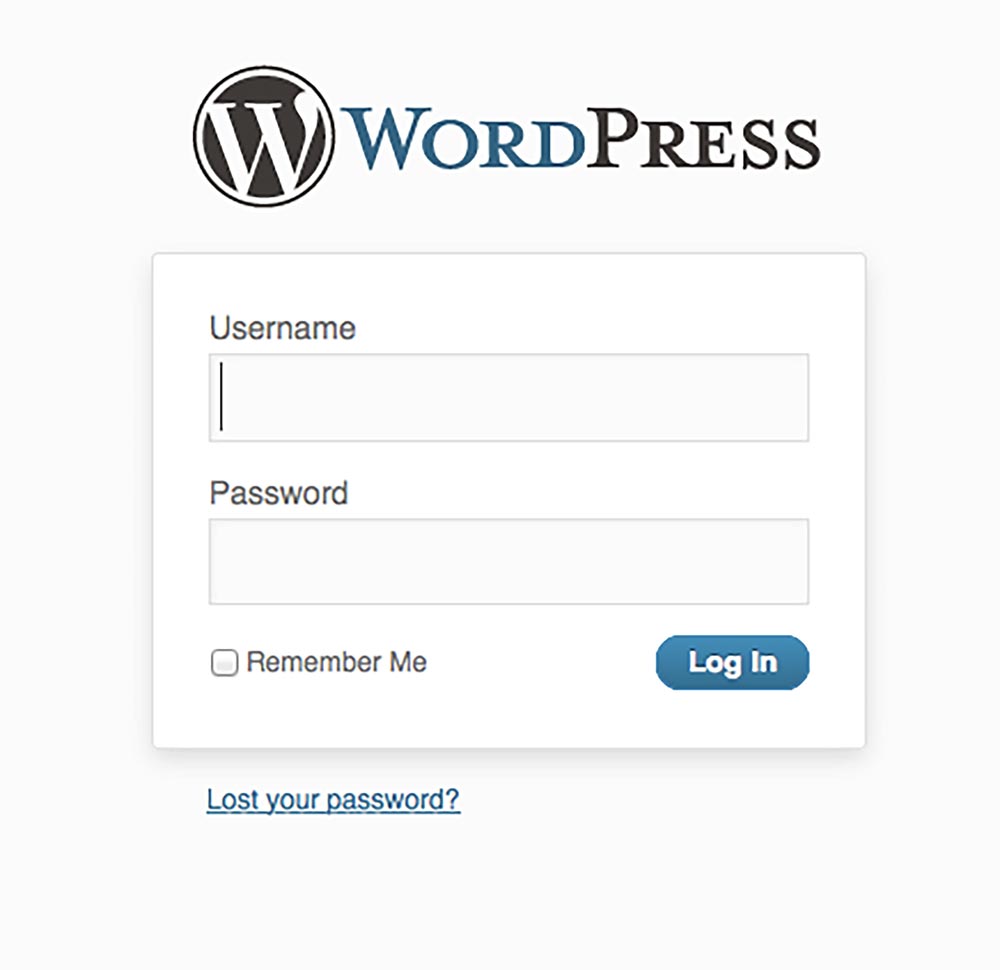
This email will contain instructions on how to go to the login page for your new Blog!
When you go there for the first time, you will have to create a password. Dreamhost will have already created a user name for you. So you will just have to create a very strong password!!! Make it at least 8 characters and be sure to throw in an upper case and number besides the lowercase letters!
3) Design your Blog
Now your Blog is officially online! Congratulations!
You’re minutes away from sharing all of your best information to the world.
First you are going to want to get your new home on the internet looking just how you want it to look.
WordPress has what are called Themes that modify the look and feel of the blog, the arrangement of the pages, the color(s) of the text, sidebar(s) on the left, right or none.
Many of my sites use the Genesis Framework with the News Pro Theme from StudioPress Themes for WordPress.
The framework is the guts of the coding and can be used stand alone. The child theme is a collection of specific design elements for the look and feel of the blog.
StudioPress is the company that offers the Genesis Framework and they have many different themes for you to consider based upon how you want your blog to look.
There are also several free preinstalled themes which come with your Dreamhost WordPress installation.

4) Start Blogging
WordPress comes with a few examples for you to look at to get a feel for who things look. You’ll find an example Blog Post, Page, and Comment. These can be deleted once you’ve checked them out.
Using WordPress is pretty intuitive and the menus and controls are fairly easy.